
![]()
There are already 200 Alias posts here, authored by me CEO LearningAlias Online Academy Graham Bullock B.Ed. (CNAA) Des. Tech. and I will be adding many more !!!!!
I Will Be Showing You How To
Create the set-up geom. in Alias World Space to create the 7 spokes with perfect tessellation
I will be teaching you how to create a life like tyre, with, Carcass, Kerb Band (Scuff Band) and YES! Tread.
The tread is made by a combination of modelling plus projecting texture
it has modelled grooves with projected texture on top of the physical geom.
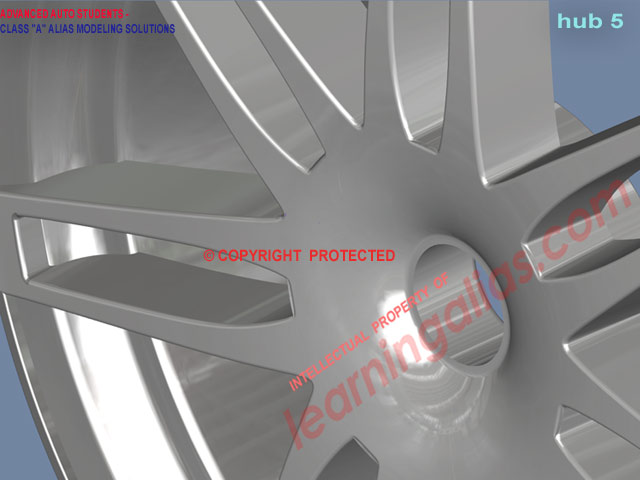
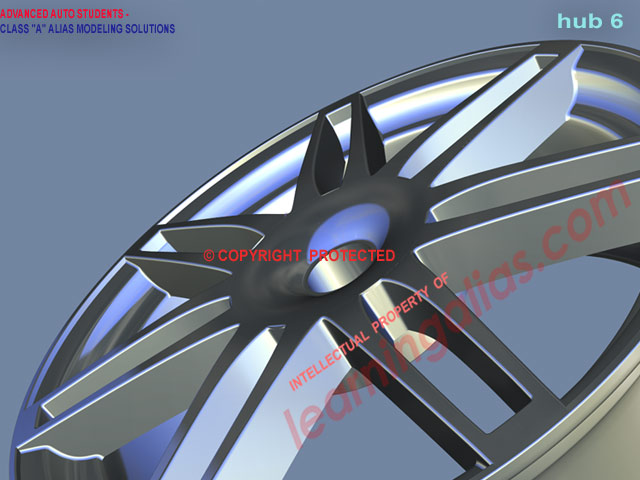
Audi Rs4 Style Wheel
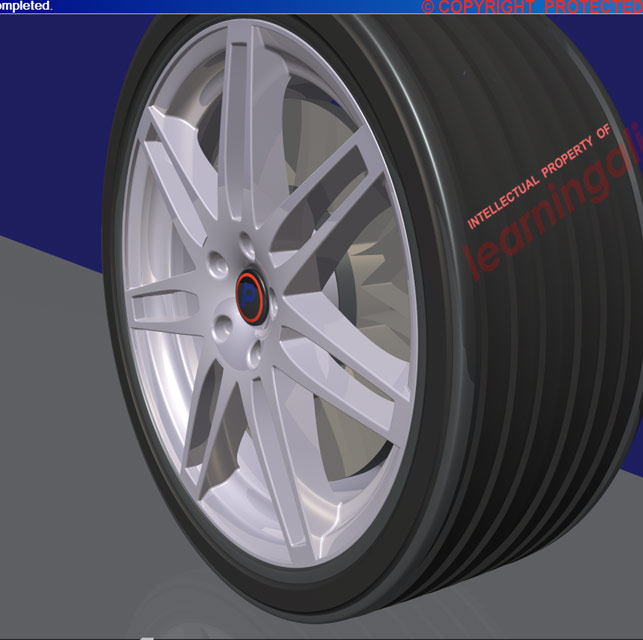
This is an Audi RS4 style wheel modelled in Autodesk Alias and rendered in Alias.
This is a difficult wheel to model, because it has an uneven amount of spokes (7) and it also has an uneven amount of bolt holes (5).
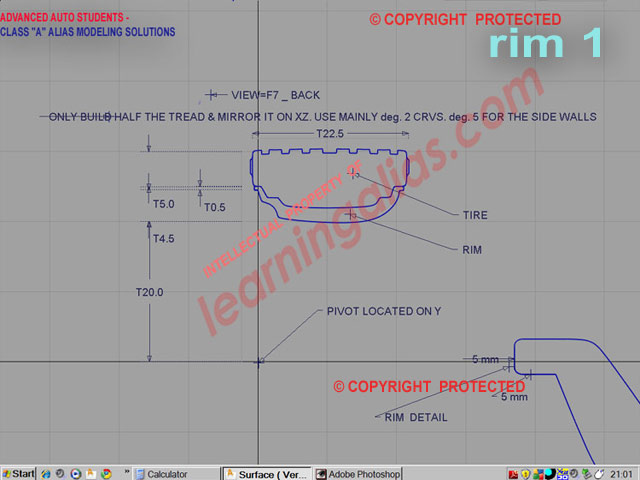 Create The Rim & Tire Revolve Curves
The protocol is to create a wheel on the origin, so in F7 (Back) set out the dimensions of your wheel. You can use a plane tire carcass or build a tread, as I have done (the tread is not flat, it has a small crown.)
Include all the radii at this point. It will save you time later having to make fillets.
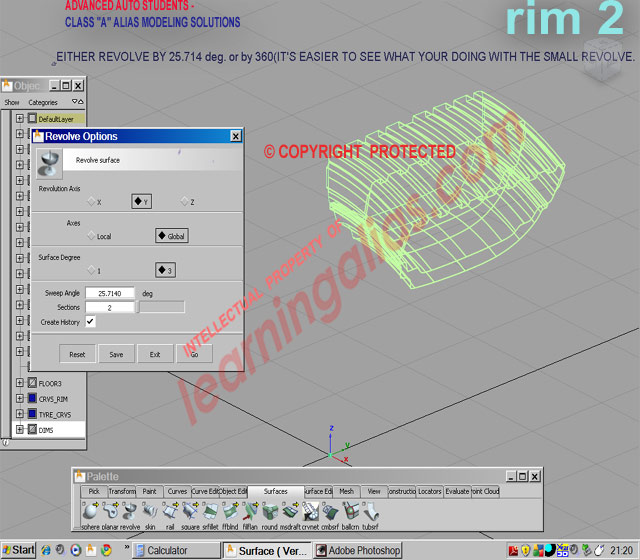
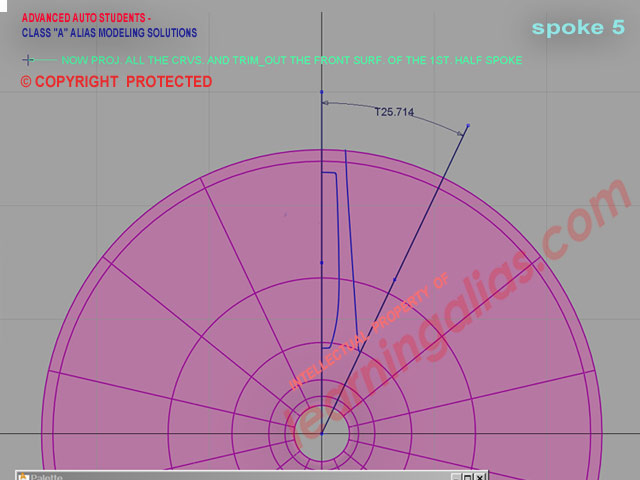
Revolve the Basic Segment of the Rim and Tire
We are going to make , half a spoke, so it makes sense to make a seg. of both the rim and tire at the same time. This wheel has 7 spokes or 14 half spokes and the deg. of rotation to form half a spoke is: 25.714285 deg. (25.714)
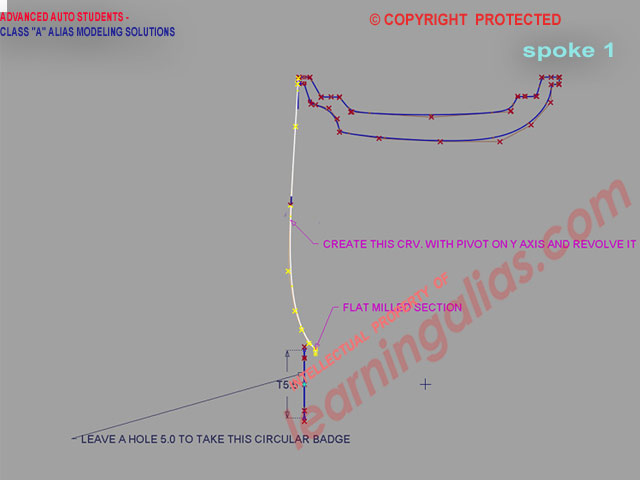
Making The First Half Spoke (Master)
using phtographic ref. make this Spoke Profile crv. which we will revolve to form the face of the spoke
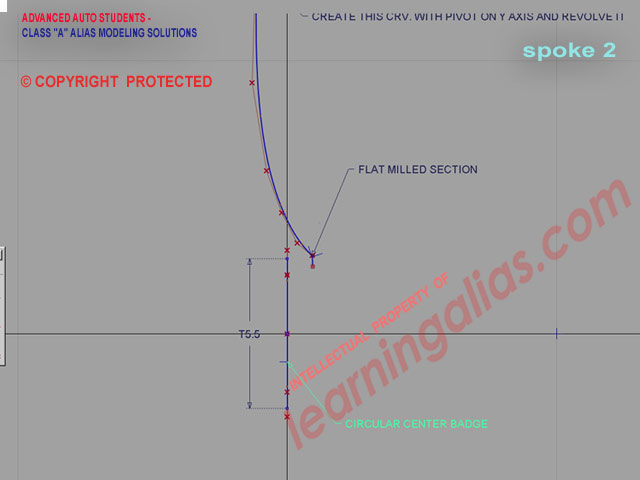
There is a 5.5 dia. badge in the cejnter of the wheel, so build your spoke crv. around that

The top of the spoke revolve crv. attach to the rim as shown
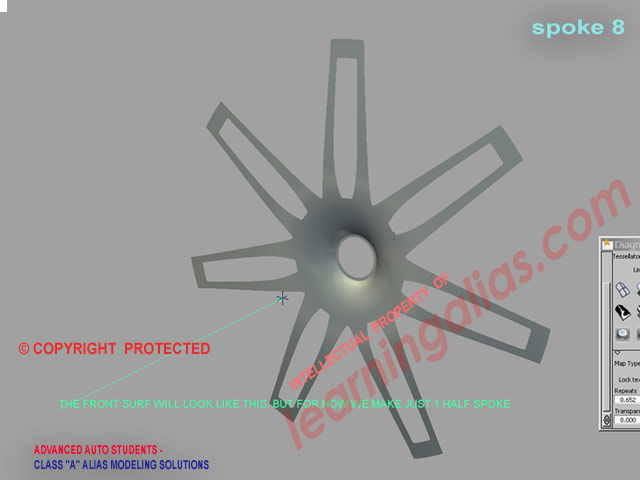
Revolve the soke profile crv. and put down 2 keylines, both on z with the pivot at the origin
Select 1 crv. and rotate it 25.714 deg.
NB: This tutorial is a WIP, so there is still information to be added. Here for example I need to create the pics. to show the workflow for aligning the spoke’s crvs.
Half Spoke Trimmed_out at 25.714 deg,
Mirror The Half_Spoke & Dup. Rotate it Around
this is only to check that you have curvature for all the segments
Once you have done this check, you can delete all but the Master Half_Spoke
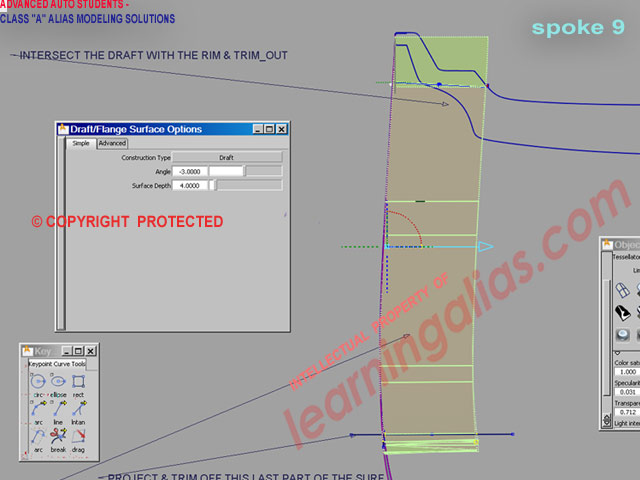
Ctreate The Sides of the Spoke using the Draft Control set to angle of 3 degs.
Part of the draft at the bottom will not build properly, so just trim it out, using a keyline, as shown

This view shows the draft surfs. with their 3 deg. angle, passing thru. the rim
Intersect them with the rim and trim_out
Build small surfaces tgo fillet the gaps between the drafts
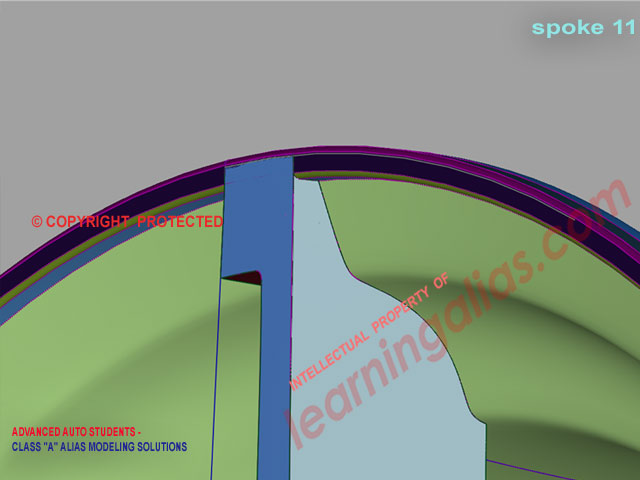
Draft Surfs. Intersected With The Rim
Now trim them out

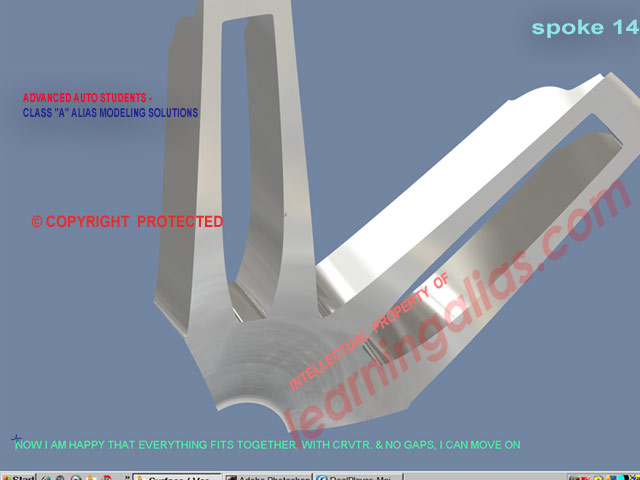
Create Small Fillet Surfs. With Crvtr.
Build 2 surfs where the drafts end. Do this by creating crvs, aligning them etc. (see fig. below)
Cretate Slave surfs. to Align With
At this point Delete the RHS. spoke and keep just the Master Half_Spoke
Let’s Start Creating The Hub
Fillet the Open Edges of the Half_Spoke
Use the Round Control or Surface Fillet Control
I am just using my imagination
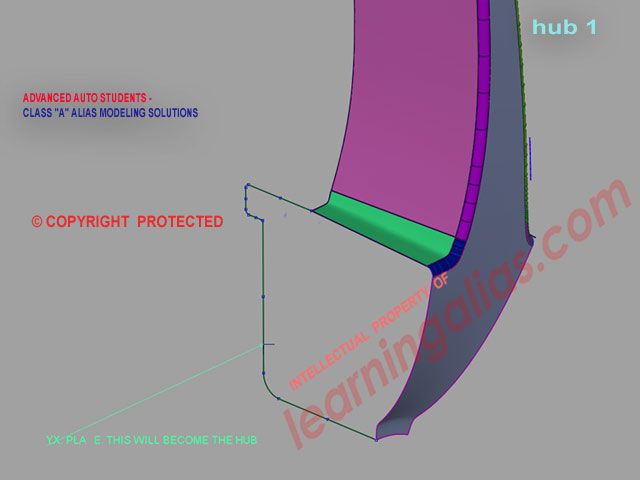
to design a locating system for the back of the hub to the bearing flange. If you wish you can take the actual engineering data & build it for real
Of course the hub crvs. must be in the YZ PL
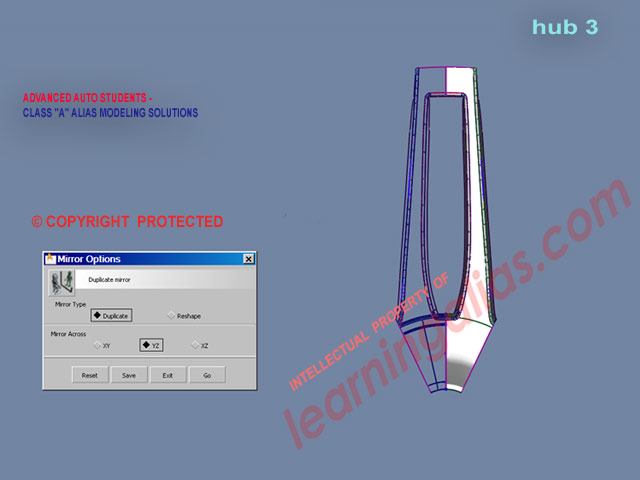
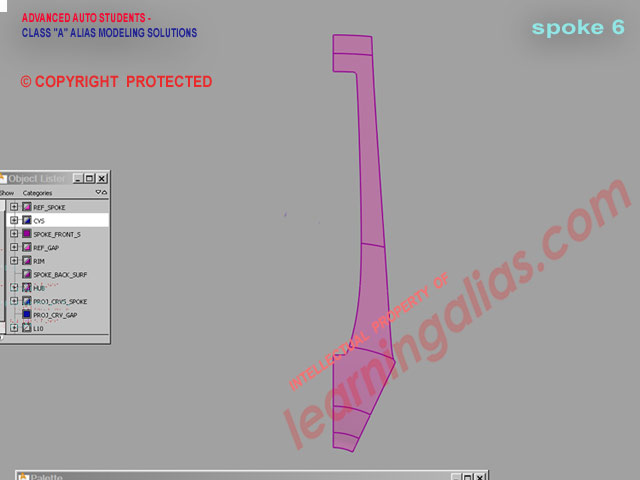
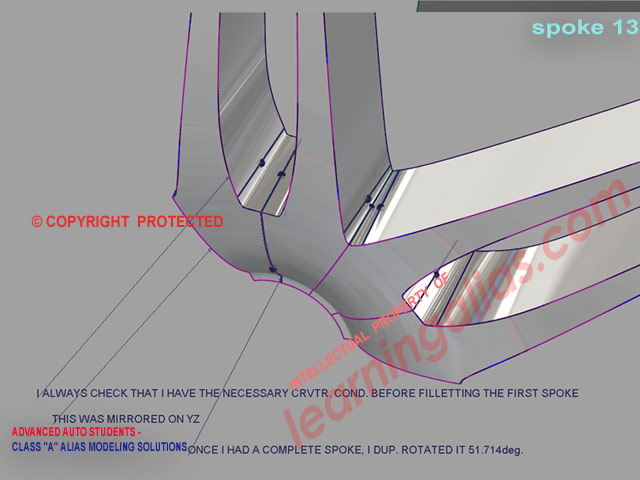
Now That The Half_Spoke Is Filleted
We can mirror it accross YZ and form a Master _Spoke
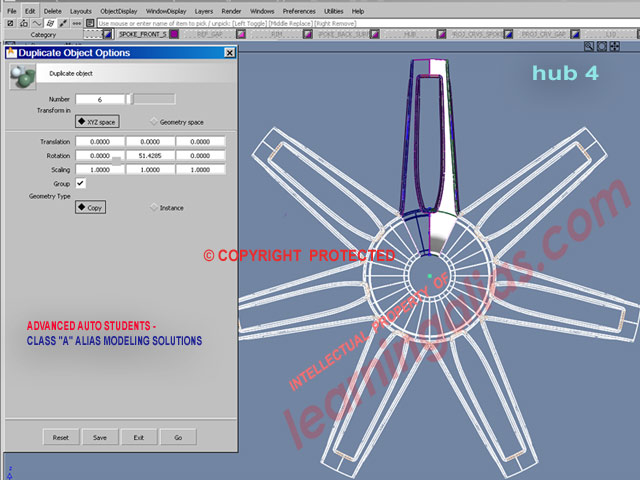
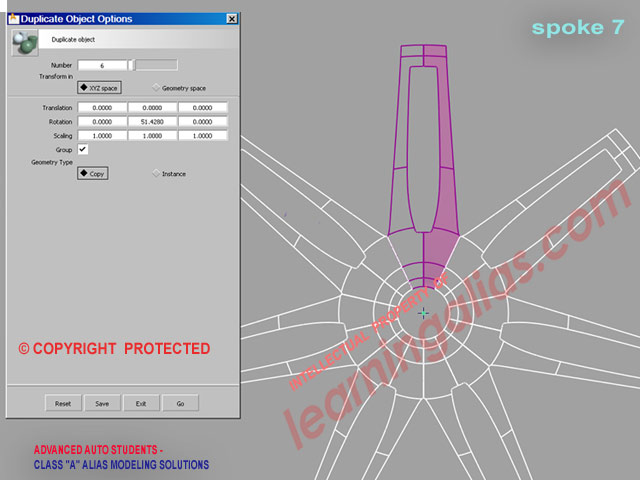
Duplicating Object to Form the Face of the Wheel Rim
Should Be Looking Like This
14 Segments Duplicated & Rotated
If you need online video training + regular help and reviews to Industry Entry level (Class A Principles), please register on my website and I will send you the course details:
Info. on Courses (Student rates):
“Course #1″.
6 Months website access to all website based video tutorials, 334 Euros (approx. 463 USD equivalent 2018)
“Full Pro. “Elite” Course”.
Fast Track Full Pro.Online Diploma Course with reviews and coaching 105 GBP (USD. 245 approx. 2018 ) per month. Private tuition. You will receive specific geometry and meshes , to help you to complete your exteriors quickly to an Industry entry level standard. This means a bigger investment, but once in an Alias modelling job you will get back what you invested many times over and be able to work anywhere in the world
For more info,
Just register on my website and I’ll send you all the details
www.learningalias.co.uk