
![]()
Variable Radius Fillets
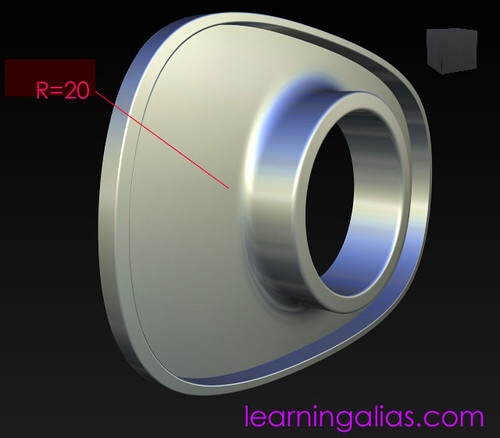
There are many occasions when the Designer will require you to build variable radius fillets
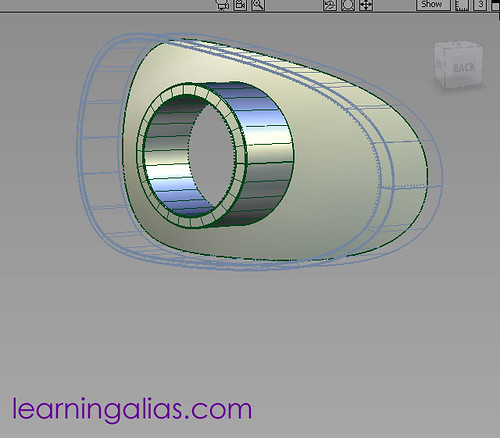
This detail is a Halogen lamp housing which is blended into a complex curved surf, that moulds around the
corner of the yacht. The Stylist requires it to have a large blend of 100.0 on the outside, but a much smaller 20.0 mm blend on the inside
Start by making a complex curved back plate
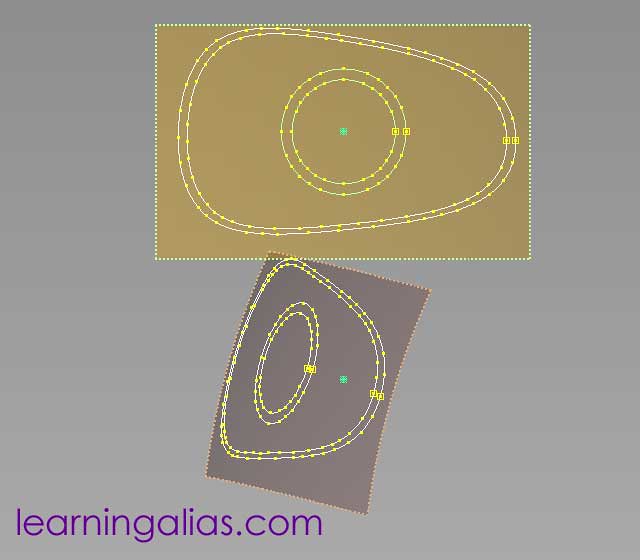
Front: make 2 crvs that represent the outer wall and 2 circles that represent the wall of the lamp
Now project them onto the back plate and hide the original curves
Draft /Flange Surf Option
Select all the COS , then set depth and pull direction. I am pulling on the Y axis

Once you have created the draft surfs.
put a skin surf across them to close them off and then
using the Round tool, select all the edges and fillet them all in one go
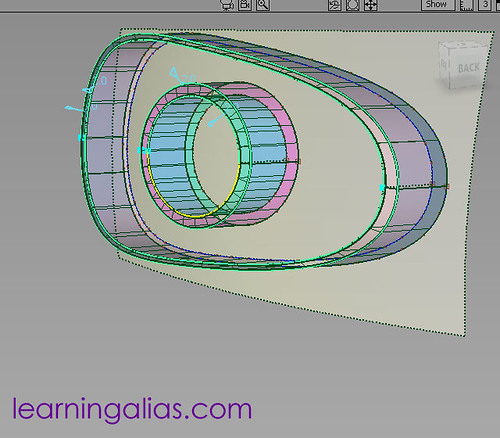
You should have a basic back plate assy that looks like this (above)
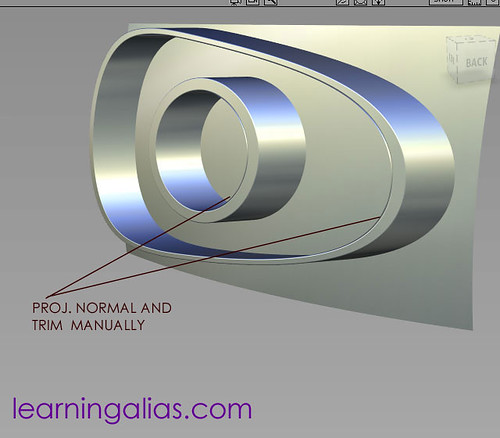
Trim away the flash
and put the outer wall on a new layer. Make it inactive
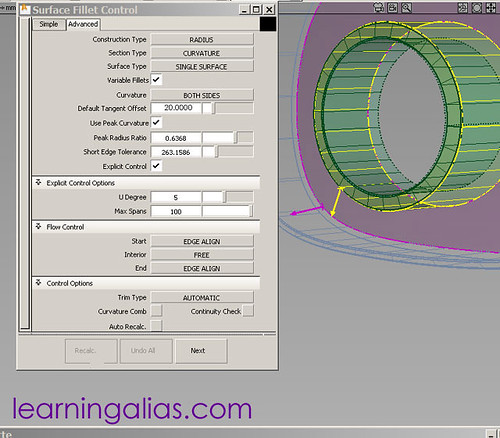
Set the Surface Fillet Control as shown above
(I have used a default tangent offset value of 20 but you may probably need the std.default setting which is 10.0000)
- select the back plate it will turn pink, then hit accept
- select the outer wall it will turn yellow then hit accept
- now you will see a yellow and a pink arrow. these indicated which side of your target surfs the fillet will build, if they are not pointing the right way, just click on the incorrect arrow to flip its direction
- now hit “build”
now you will see that a uniform radius fillet has built
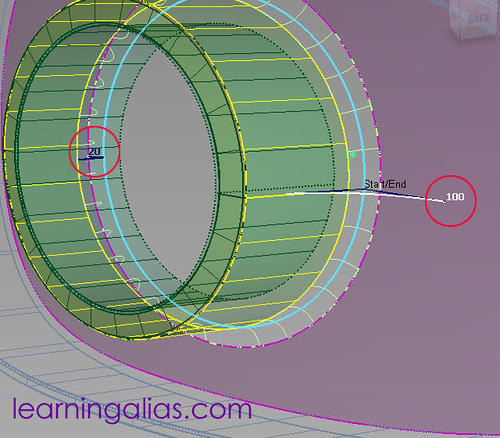
- click on the right hand side of the blue indicator line
- a radius indicator will appear. In the prompt line, type in a high value , mine was 100. you may onlyneed say 25 to 50
- click on the leftt hand side of the blue indicator line
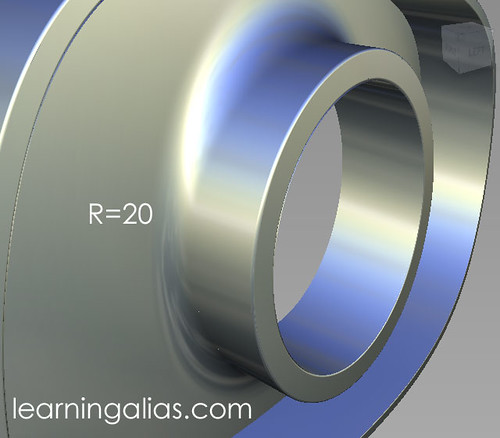
- a radius indicator will appear. In the prompt line, type in a low value , mine was 20. you may need less
- hit Recalculate and the final variable fillet will build
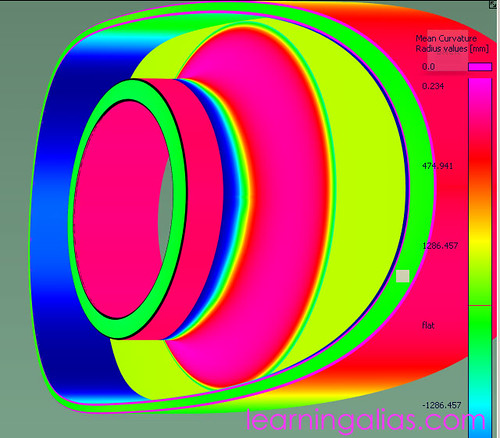
Curvature Evaluation
set to “mean” and value 10.0 we can see the superb quality of surfaces available from the Surf Fillet Control

Zebra Stripe Diagnostic
tessellator turned up full, plot set wide and Shader Anti-Alias set to medium, everything looks fine
the Stylist is right again the variable radius fillet looks beautiful


My New Website is now live!
and if you want to accelerate your progress to Ind. Entry level, why not sign-up for one of our Pro. Modelling courses now?
Click here to visit the LearningAlias website www.learningalias.co.uk
Info. about LearningAlias course:
“Course #1”.
6 Months website access to all website based video tutorials, 167 Euros (200 USD equivalent Nov.2011)
“Course #2”.
167 Euros (200 USD equivalent Nov.2011) per month. You get your .wire reviewed by me every 15 days and you will receive : feedback, instruction, tips and advice from me personally. Access to all videos including my ” Private Student Training Videos”. You will build at least 3 complete automotive exteriors. The course also includes an intensive Reverse Engineering section, which required by most employers and is often given as a practical test at interviews.
“Course #3”.
Fast Track Full Pro. “One to One” Course with weekly reviews and coaching 250 Euros (USD. 300 approx. Nov. 2011) per month. One to One Private tuition. You will receive specific geometry and meshes and modeling from me personally where required, to help you to complete your exteriors quickly to an Industry entry level standard. This means a bigger investment, but once in an Alias modeling job you will get back what you invested many times over and be able to work anywhere in the world
For more info,
Just register on my website and I’ll send you all the details

USA:
If you are in the USA, just register and login, then go to Profile and you can pay your subscription with your US credit card. Absolutely no extra charges for currency conversion.
Regards
Graham Bullock B.Ed.(CNAA)Des.Tech.