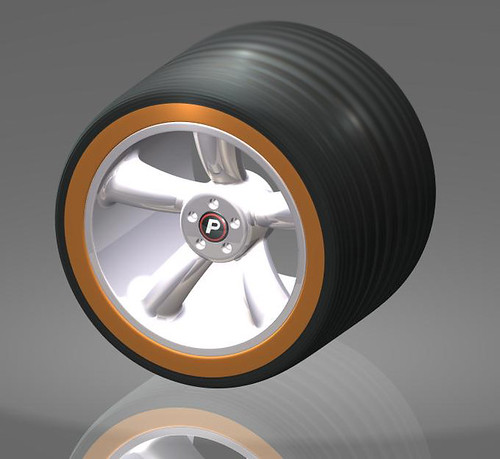
Alias Wheel Tutorial – part – 4
Alias Studio Wheel Tutorial – part – 4Author: graham
Objectives:
-
Projecting and trimming bolt hole
-
Building internal surfaces for bolt Hole
-
Filleting surface edges
-
Mirroring the 36 deg half segment accross the YZ plane to form the first segment of the 5 segment wheel
-
Create an eliptical, conical, curved spoke
-
Learn how to allow space for the creation of fillet surfaces later on in your work flow
-
Create curves on surface using the Tubular Offset Control tool
-
Repair c-os that are short of the relevant surface edge
-
Cretate freeform fillet surfaces
Here goes:
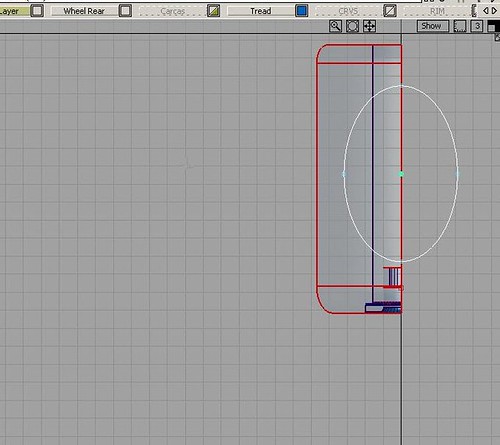 Top view, select only the left half of the Hub segment and hide the rest of your model >Object Display>hide unselected>Create an ellipse on the Y axis which represents the cross section of your 1st Spoke >keypoint curves>ellipse>>and set the attributesMake sure that you leave 13mm clearance around it on the center surf. of your hub (This space will be needed to create the fillet between the Spoke and the Hub)Detached the ellipse on its major axis and delete the part shown as highlighted.>object edit>detach tool.
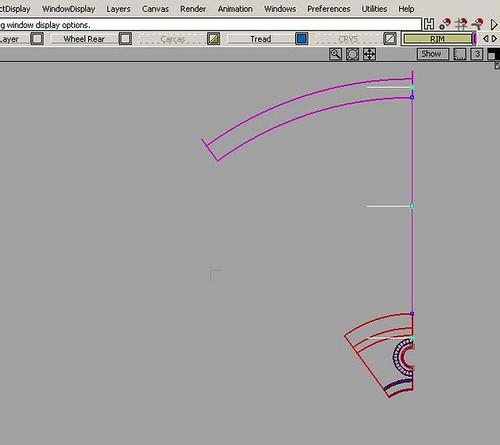 Left view copy and paste the half ellipse twice and move 2 of them upwards. Place copy N0.1 in the vertical center of the spoke and then copy N0.2 just above the Rim levelMove the 1st one down inside the Hub
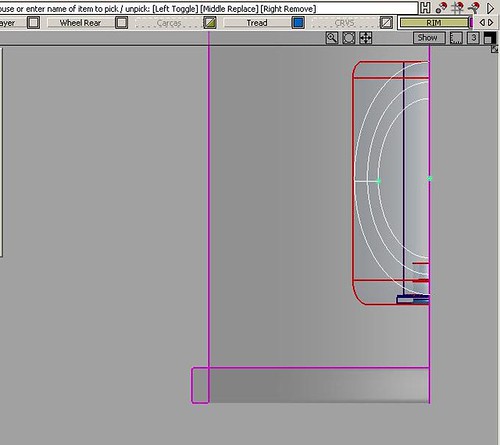 Scale the 2nd and 3rd half ellipses up in size, so that your spoke will get thicker towards the topAs an aid for scaling the ellipses in the Left view I placed a keypoint curve at an angle representing the outside edge of the spoke. You can see this as a short line on the minor axis of the ellipses in my pic.
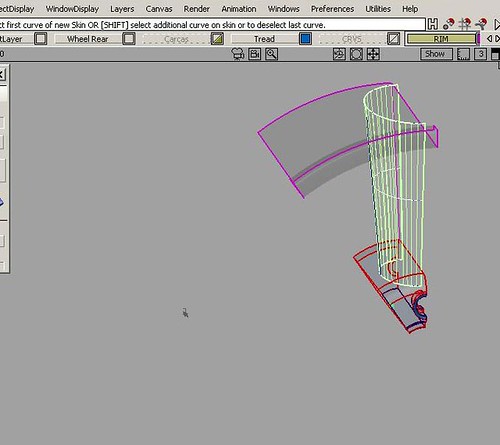
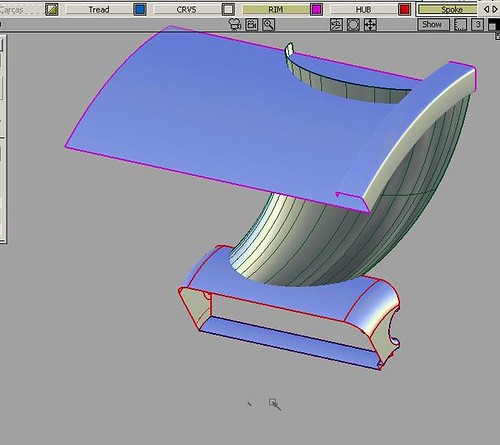
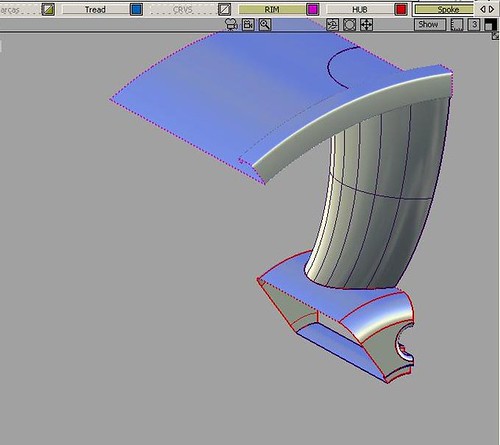 Perspective view: with the skin tool selected click on the bottom ellipse, then the middle one NOW hold the shift key as you click on the top ellipseAs you can see your new spoke’s skin surface has loads of spans. Go to the control panel and reduce them to say 8Perspective view: Move the middle elipse out along the Y axis, this will create an attractive curve in the spoke’s surface, as the surface updates to the curves movement. This is the magic of Alias at work!You’ll also need to move the top ellipse in, so that you have space on the Rim’s surf. to create a really attractive 25mm fillet
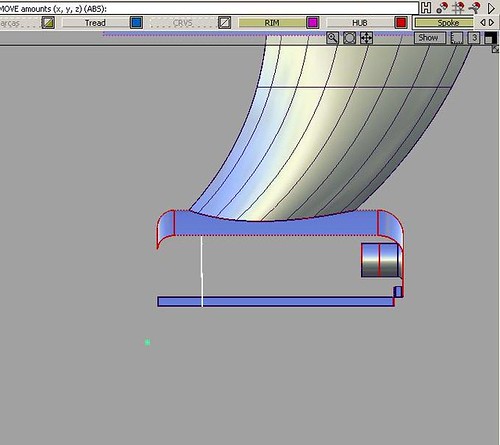 Front view: We can see that we have created a really beautiful shaped spoke just by one, scaling the ellipses and two, moving the center ellipse.Now we are going to create the milled rebate surface where the wheels center (hub) locates onto the wheel bearing/disc brake hubSkin a surf. to form the bolt hole milled through the hub, as shown
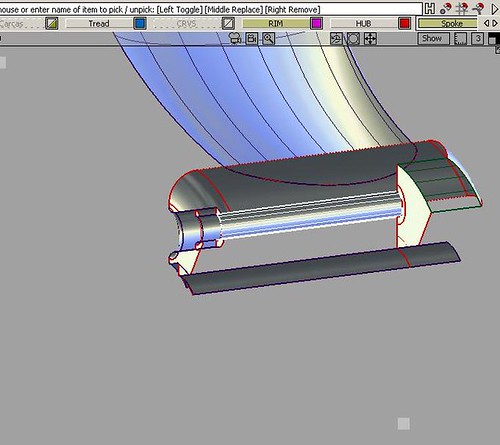 Select the verticle surface at the rear of the wheel hub and move it about 15mm forwards along the Y axisPerspective view: Create a skin surf. to complete the milled rebate and trim off the redundant part of the wheel’s center hole surf.Now intersect the spoke surf. with both the Hub and Rim surf. and trim off the excess
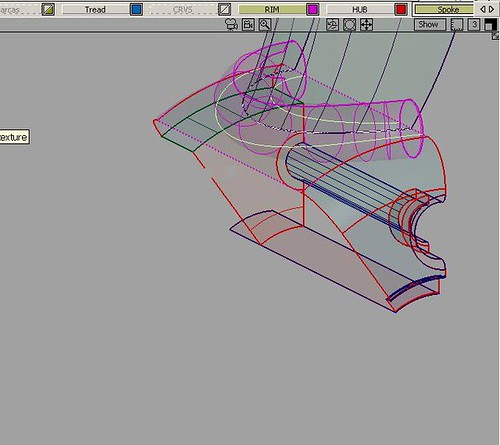 >surface> fillet flange tool>Tubular Offset tool. Set the tool up as shown.Where the spoke and hub intersect, select both C-O-S (curves on surface) this will produce a tubular surface which intersects both your surfaces with an offset distance = to the radius you have set. whilst creating c-o-s on the relevant surfs.If you don’t get c-o-s on both the spoke and the hub, just intersect the tubular surf. with the surf. that is missing a c-o-s.i.e. with the intersect tool >the spoke > go > the hub > go.Now delete the tubular surf. as it has done its job
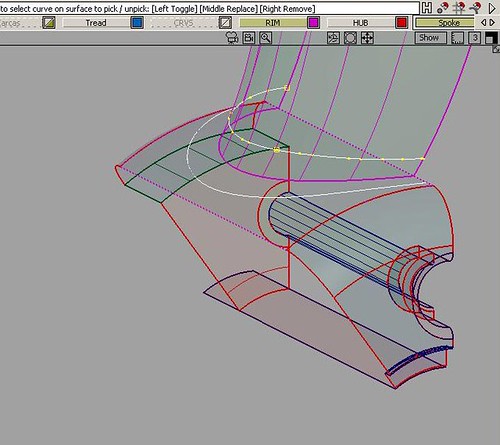
IMPORTANT: make sure that your c-o-s reach the edges of the relevant surfaces. If they don’t, extend them with >object edit>extend tool (with merge and extrapolate switched on). If this doesn’t work create small curves and project them, Top view for the Hub and Front or Back view for the spoke to continue the c-o-s to meet the edges of your surfs.
Here are the C-O-S selected and ready to create the fillet surf.
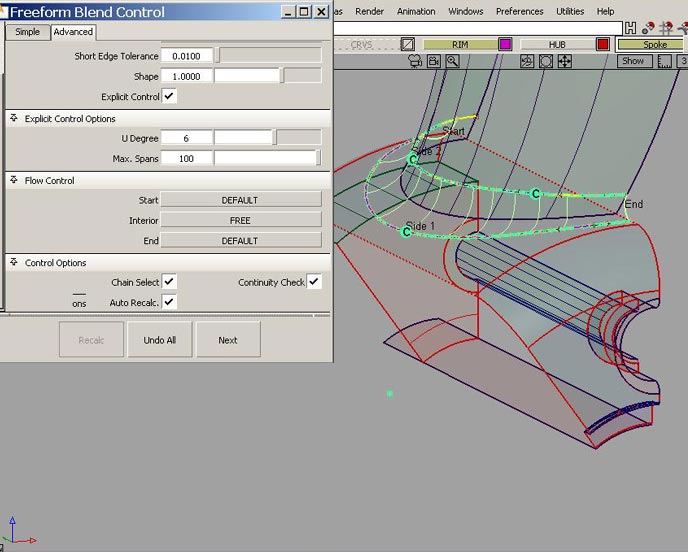 Perspective view: >surface>freeform blend control. Set as shown
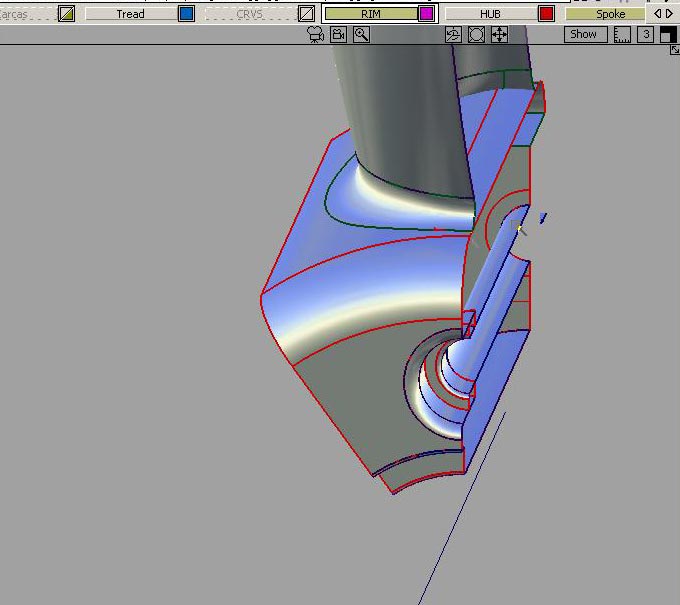 Congratulations you have created a really tricky surface set, that looks beautiful !!!________________________________________________________________

