![]()
![]()
Please donate just 1 Eur/1.3 USD. Why not take 2 min to do it now?
Learning Alias sponsors the Education of children in Nepal. This is Deepana and we need to raise money to put her through Nursing College in Kathmandu. Learning Alias Blog is a free service, but if you would like to show your appreciation, please make a small donation. 100% of your money will go directly to pay Deepana’s college fees. Without the help of sponsors in the developed world, Deepana would receive no education whatsoever, as she comes from a remote Hymalayan village. Thank You for your kindness, graham bullock.
PayPal or Credit Card. NB: US Credit Card accepted
Making a Front Grille in Alias Studio
I built some projection curves and projected them onto the front surface to get curves on surface. I trimmed out the aperture using trim divide and moved the piece I had cut out backwards to form the back surface of the grille box. I made the grille box by running the Tubular Flange tool around the aperture < Single Surface, so you build the grill box fillets and draught surfaces all in one go. I set the Tubular Flange tool to < Radius 5mm < Flange depth 200mm. I then selected the tubular surface and assigned it a chrome shader.
Making Louvres in Alias Studio
I took a Duplicate Curve from the top outside edge of the tubular surf. and moved it down Z to where I wanted my first louvre to be built. Then I created a nice louvre cross section with a single curve and extruded it. Having done that I duplicated 4 extra louvres with < edit < duplicate < object.
Making the Verticle Vanes in Alias Studio
I dropped a planar surface at the origin in the left view and then mass produced the other 9 vanes using the Duplicate Tool. By plying around with the Transformation settings and + and- values it doesn’t take long to get a set of duplicates accurately set out. Once I had the 10 vanes, all I needed to do was slide them back on the X axis to suit the curve of the grille in the plan view.[slickr-flickr tag=”alias Duplicate Objects Option” type=”]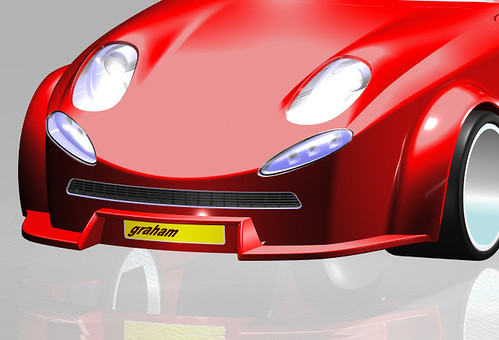 ________________________________________________________________
To Learn Alias Automotive to Industry Entry level has been made easier.
For student’s who have the objective of finding a CAD job in the near future, I still teach One to One students and all of these students get Automotive Modeling or Design/Modeling jobs, so it’s a great investment to make. The hourly rate is very high and there are vacancies in UK. France, Germany, Sweden, Spain, USA, Brazil etc. I can only take a maximum of 5-7 students at any one time. I teach all levels right up to Post Graduates. I have never had a Private student fail to get an Alias Automotive job (Companies include Ferrari, GM, Lotus, Opel, Audi Seat etc. ). If you wish to apply for a place, please email me with all your details.
Why not visit my website and take a look for your self?
Over 100 videos on many, many aspects of Learning Pro. Alias
I show you how to build a Complete Audi A5 Sportback (ext.) . Over 50 Videos on that alone !
Info. on Courses:
“Course #1”.
6 Months website access to all website based video tutorials, 167 Euros (215 USD equivalent Sept. 2012)
“Course #2”.
167 Euros (215 USD equivalent Sept. 2012) per month. You get your .wire reviewed by me every 15 days and you will receive : feedback, instruction, tips and advice from me personally. Access to all videos including my ” Private Student Training Videos”. You will build at least 3 complete automotive exteriors. The course also includes an intensive Reverse Engineering section, which required by most employers.
“#3 Full Pro. “Elite” Course”.
Fast Track Full Pro. “One to One” Course with weekly reviews and coaching 200-250 Euros (USD. 260-320 approx. Sept. 2012) per month. One to One Private tuition. You will receive specific geometry and meshes and modeling from me personally where required, to help you to complete your exteriors quickly to an Industry entry level standard. This means a bigger investment, but once in an Alias modeling job you will get back what you invested many times over and be able to work anywhere in the world
NB: Typically students pay 50% of the cost of the “Elite” course by monthly installments settling the balance over time, once they have an Alias Automotive contract.
For more info,
Just register on my website and I’ll send you all the details
www.learningalias.co.uk
*** Special 25% Discounts for US students (Message me on my website for details)

USA:
If you are in the USA, just register and login, then go to Profile and you can pay your subscription with your US credit card. Absolutely no extra charges for currency conversion.
Regards
Graham Bullock B.Ed.(CNAA)Des.Tech.